See How Popsee Works
A quick visual tour of everything you can do with Popsee.
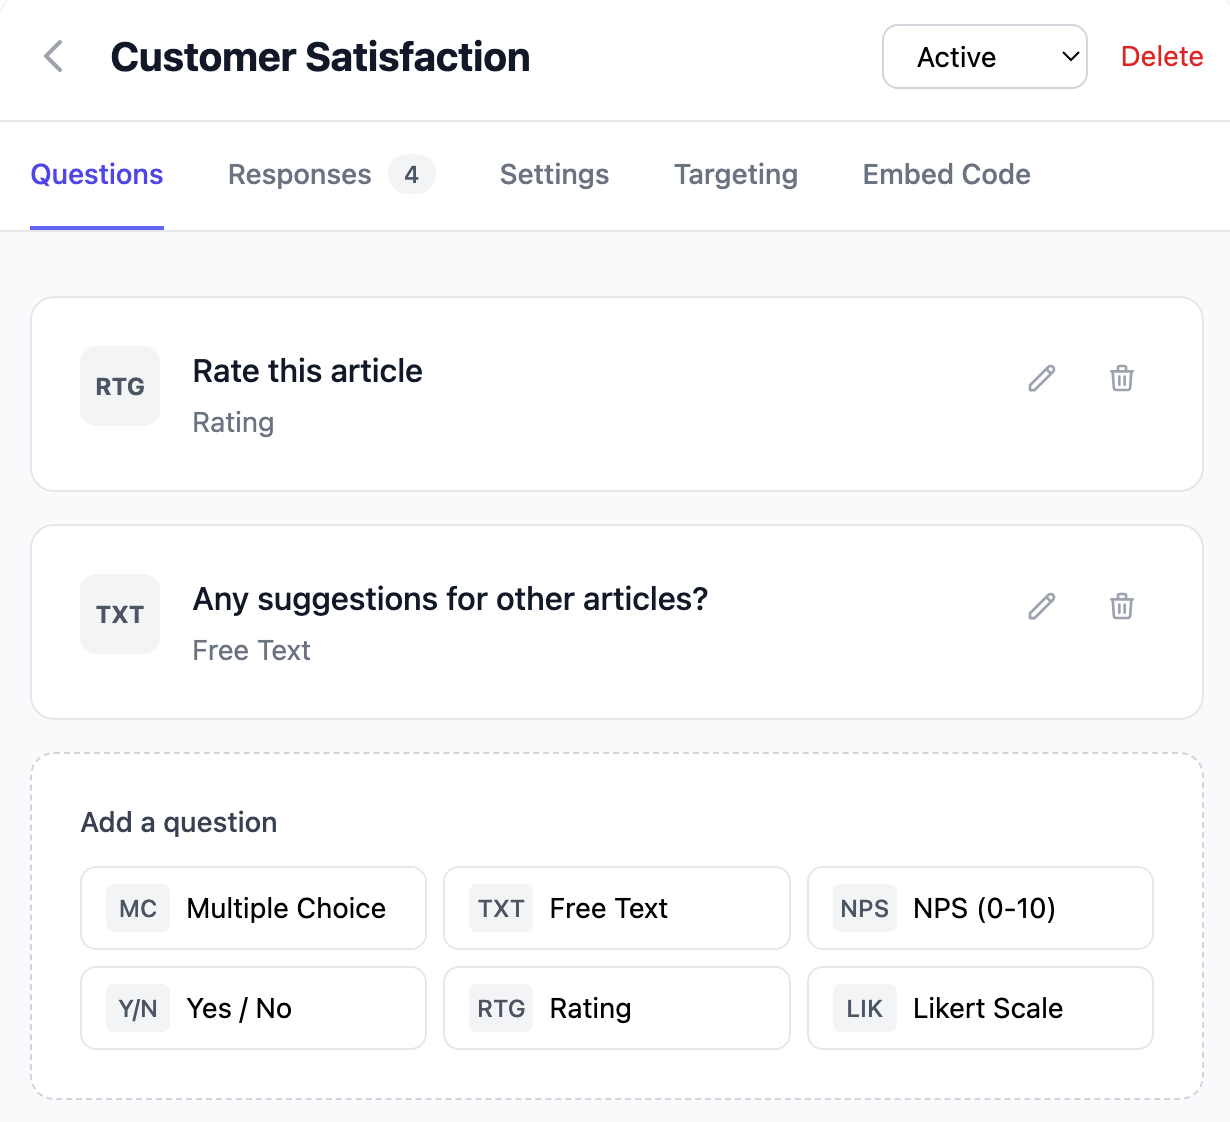
Create Your Popsee Survey
Start with a blank survey or choose from our templates for common use cases like NPS, exit surveys, and customer satisfaction. You can ask multiple questions, but we encourage 3 or fewer.
- Multiple choice, text, NPS, and rating questions
- Add branching logic for follow-up questions
- Customize colors to match your brand
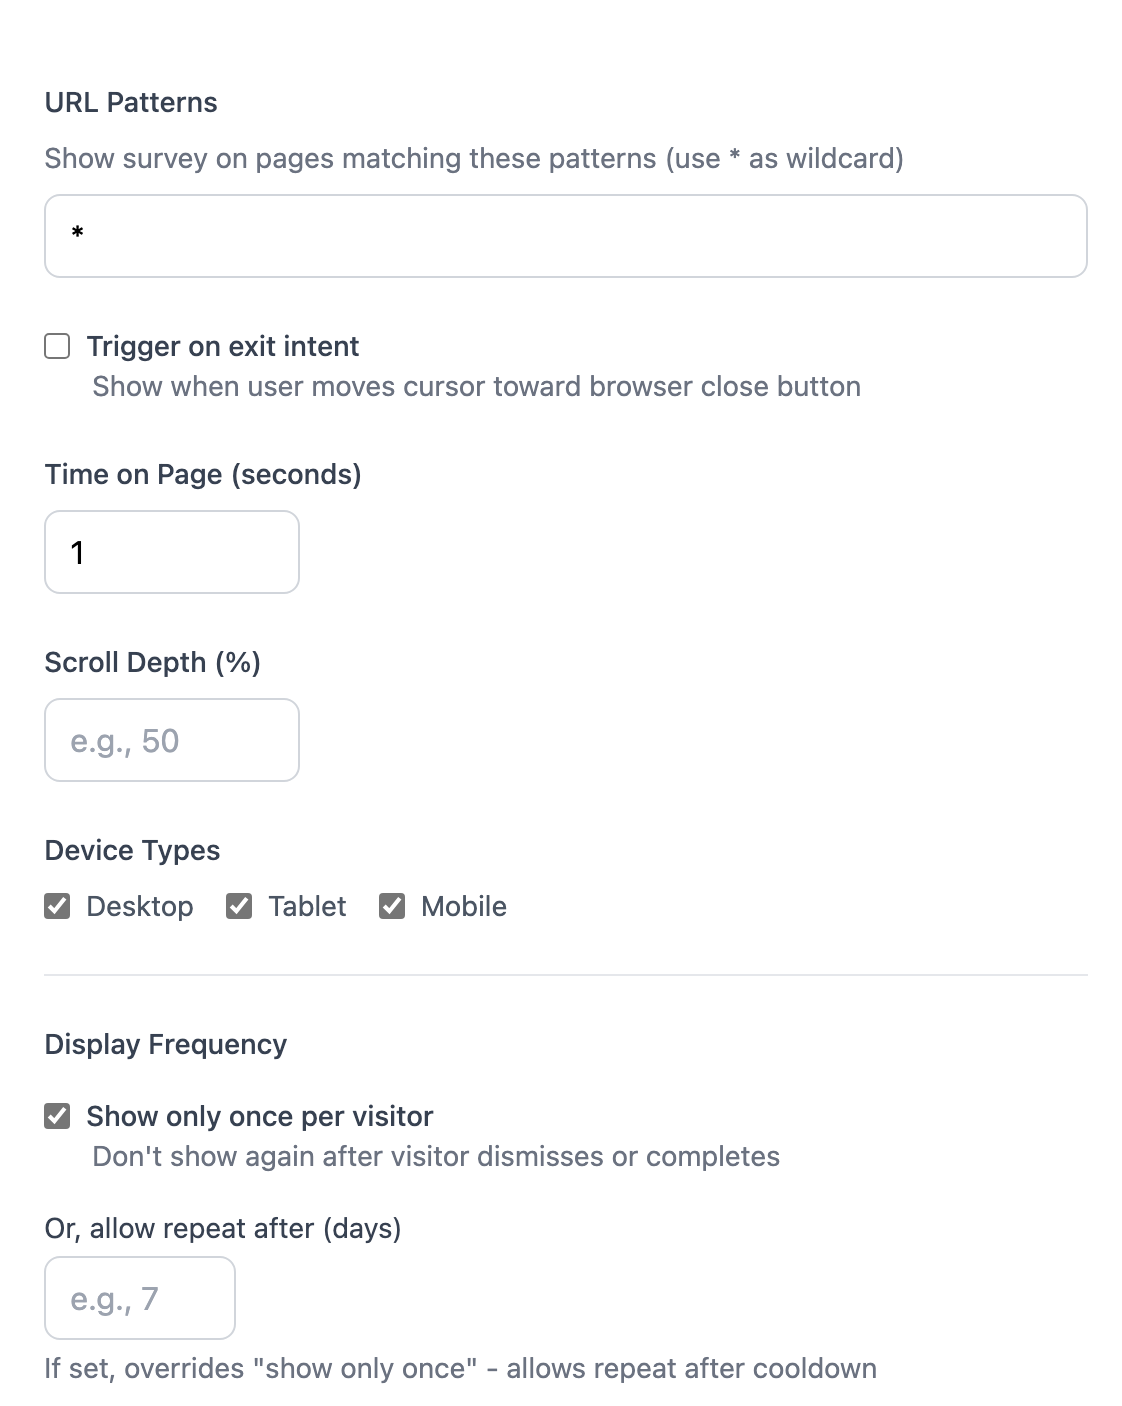
Set Targeting Rules & Styling
Show your survey to the right visitors at the right time. Combine multiple conditions for precise targeting.
- URL patterns and page matching
- Time on page and scroll depth triggers
- Exit intent detection
- Device type and geographic location
- Set accent color, light/dark mode
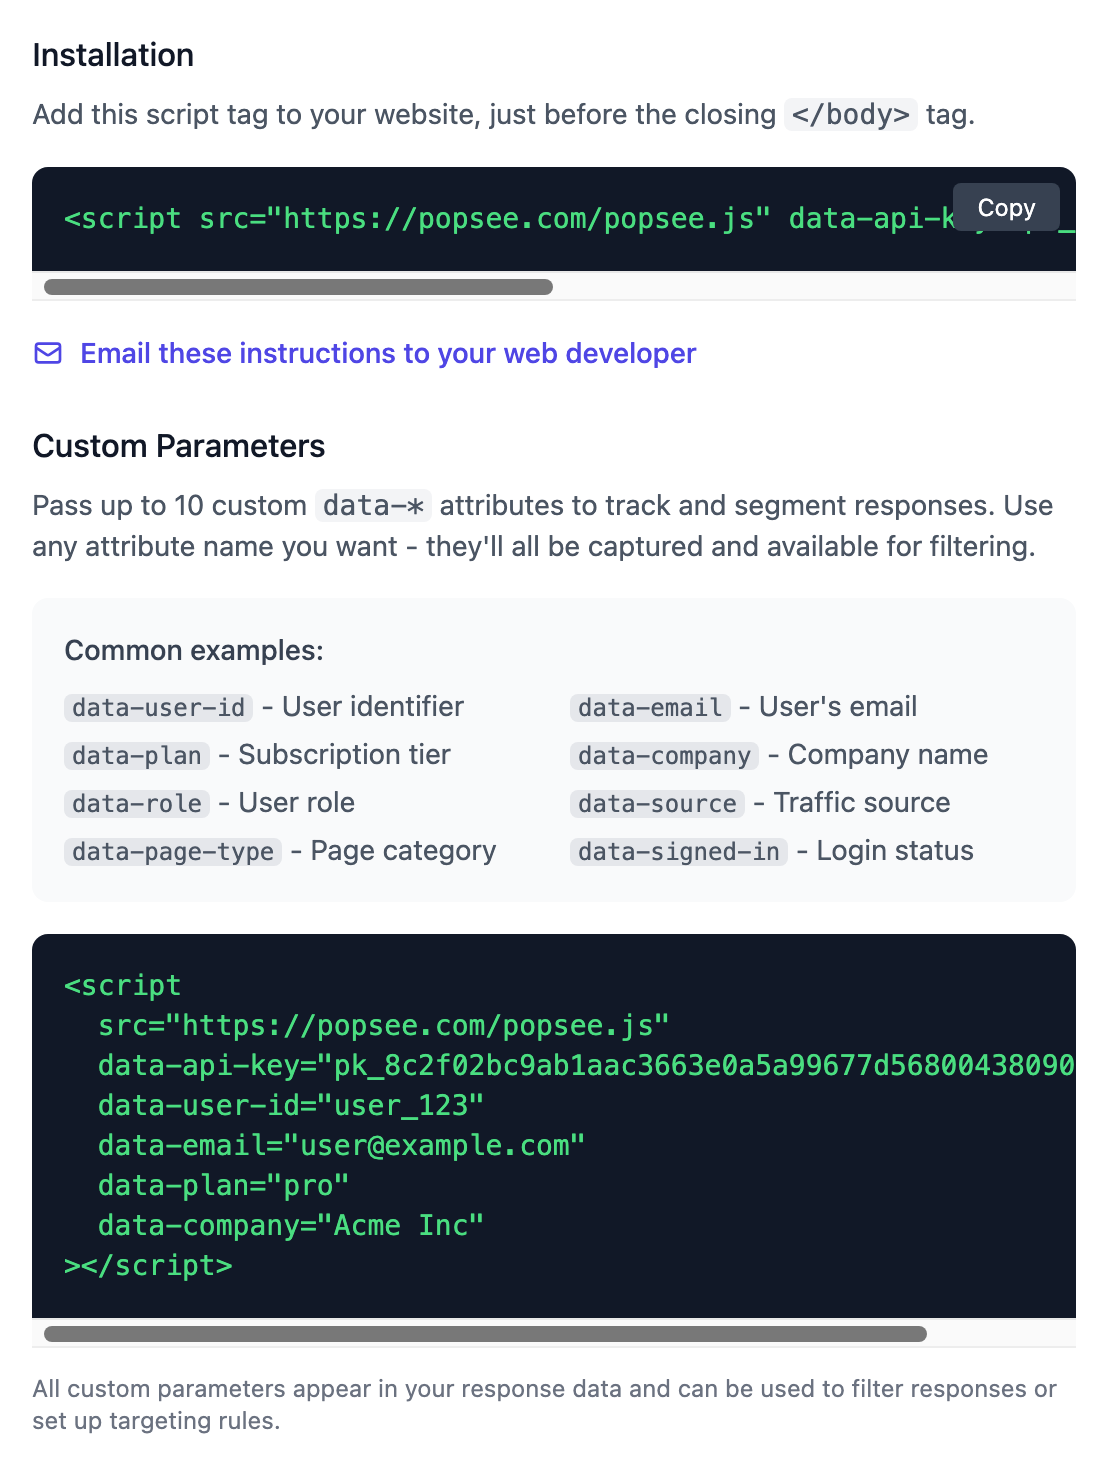
Install the Widget
Copy one line of code and paste it into your website. Works with any platform — WordPress, Shopify, custom sites, and more.
- Single script tag installation
- Pass custom data like user ID or plan type
- Tiny and fast — won't slow your site
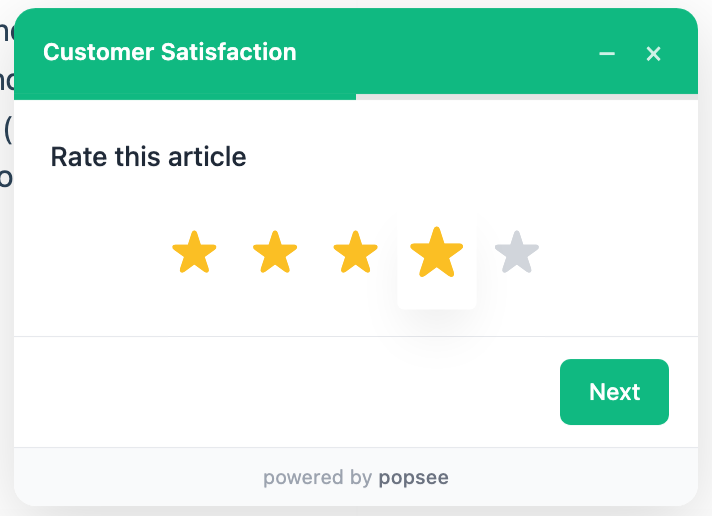
Collect Responses
Your survey appears to visitors when targeting conditions are met. The widget is unobtrusive and easy to dismiss.
- Slides in smoothly from the corner
- Remembers visitors who dismissed or completed
- Works on desktop and mobile
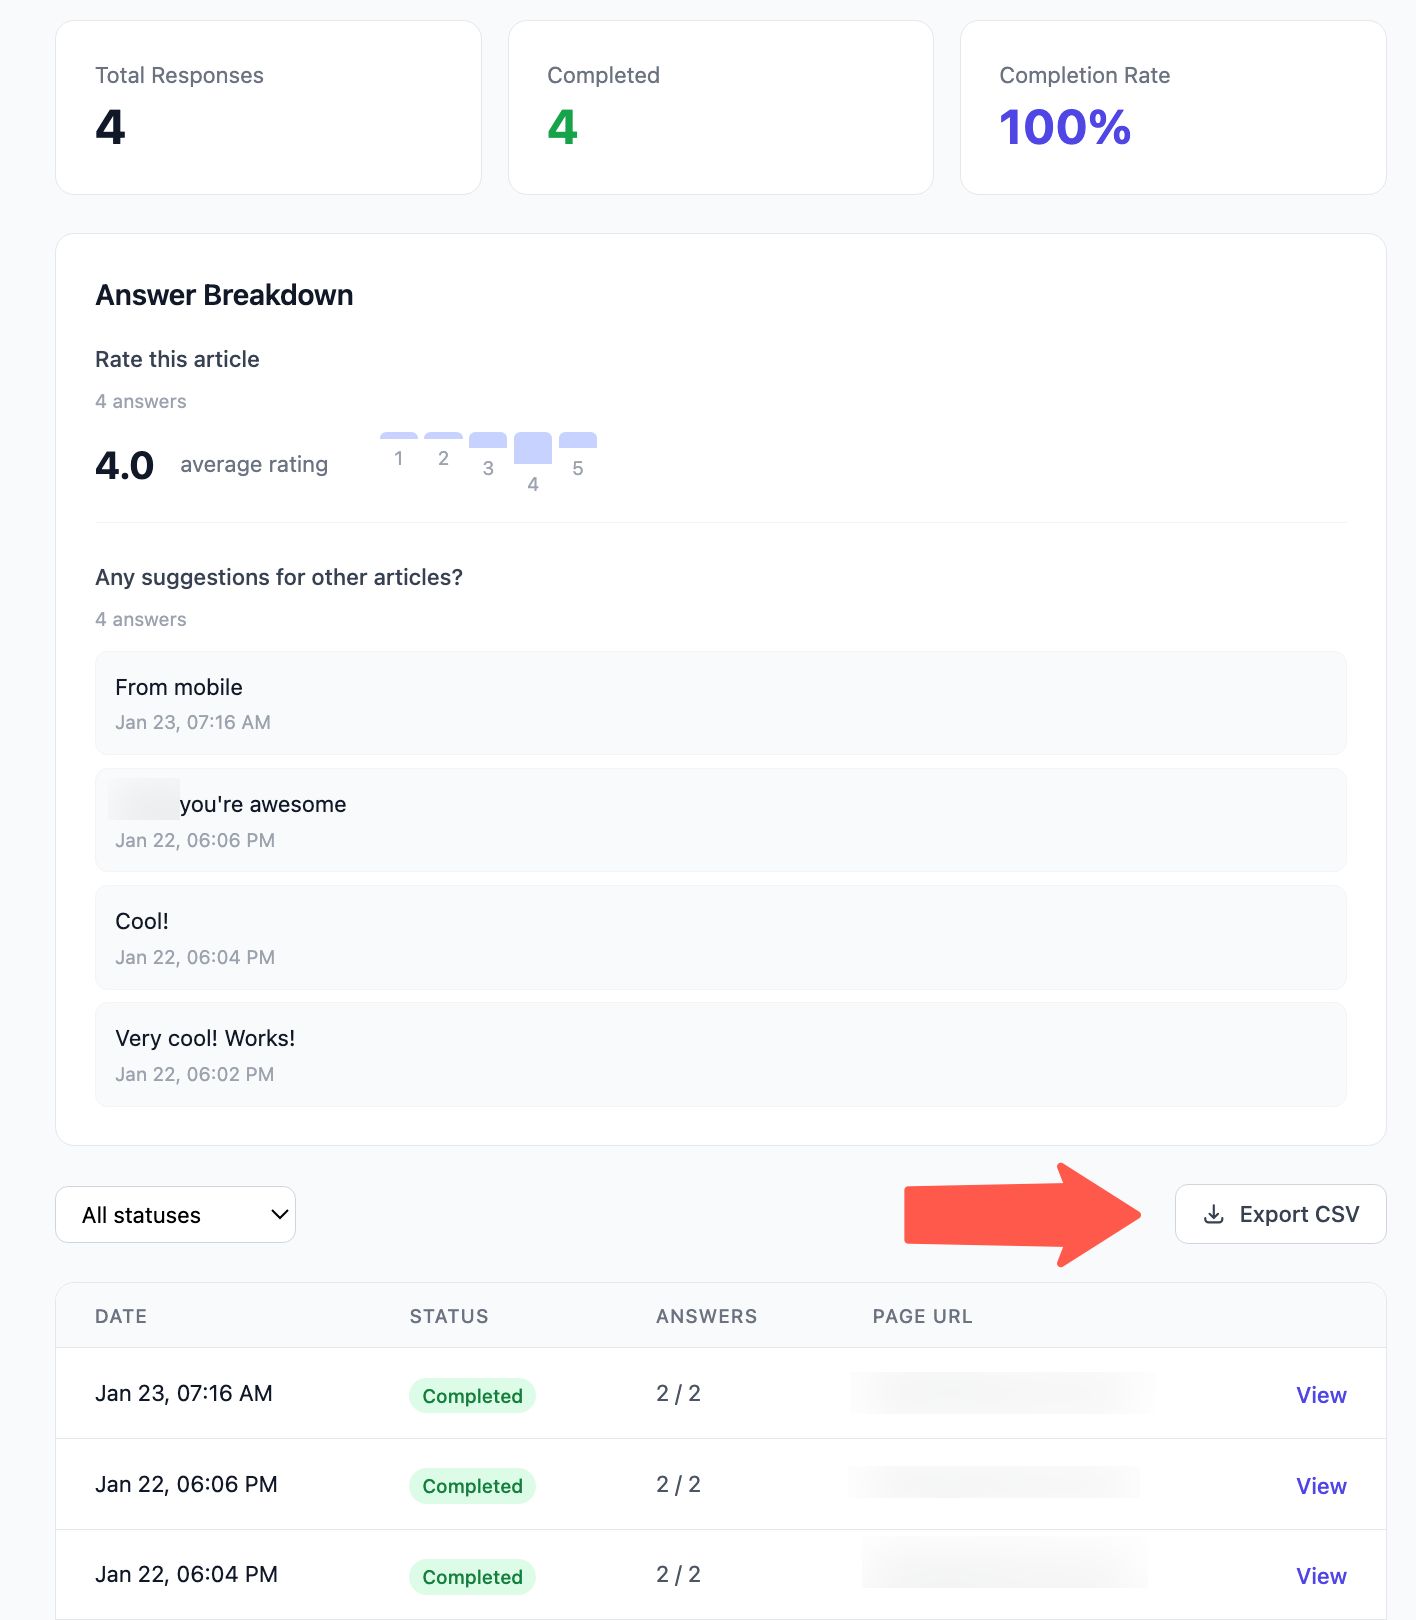
Analyze Results
See responses as they come in. Filter by custom parameters, view individual responses, and export to CSV for deeper analysis.
- Real-time response dashboard
- Filter by user attributes and custom data
- Export data to CSV
- Webhook integration for real-time alerts
Ready to get started?
Create your first survey in minutes. Free 14-day trial, no credit card required.